
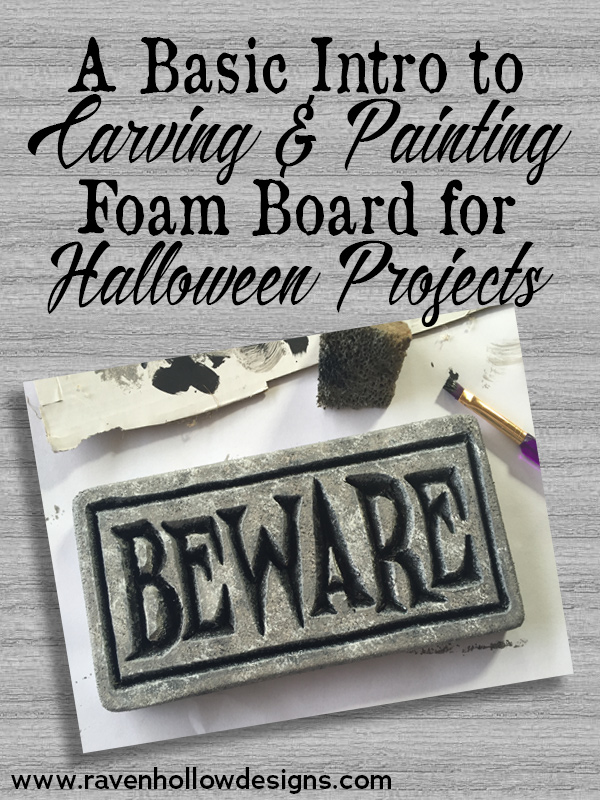
From tombstones and signs, to pillars, columns and coffins, foam insulation board (also known as rigid insulation) is an incredibly useful and versatile material for Halloween projects. You can find it in home centers and stores that sell building materials and it comes in varying thicknesses, most commonly 3/4 inch and 2 inch. It’s lightweight and easy to carve, melt, distress, and paint, which makes it perfect for constructing Halloween decorations. Many of the handmade tombstones you see all over the internet are made with foam insulation board. Today I’m going to show you the basics of carving and painting this foam board with a tutorial for a simple small sign with a faux stone look.
I created this small sign to use as part of a Halloween wreath I recently made my sister-in-law for her birthday. Here is the finished wreath with the sign in place (see below). A future post will give the how-to information for this wreath as well.
Here’s a close up the sign attached to the wreath.

To make a sign like this, you will need:
3/4″ foam insulation board (approximately 4″ x 9″)
Hot knife, wood burning tool, or Xacto/craft knife
Primer
Black, gray and white latex or acrylic paint
Clear polyurethane (can or spray)
Paint brushes
Sea sponge for painting
Start with a small piece of foam in a rectangular shape. Mine is approximately 4″ x 9″. Sand the edges of your shape to smooth them and make them look aged. After that, I created the lettering and border on my computer and printed it out in a size that fit my foam shape. I taped the lettering onto the foam block.
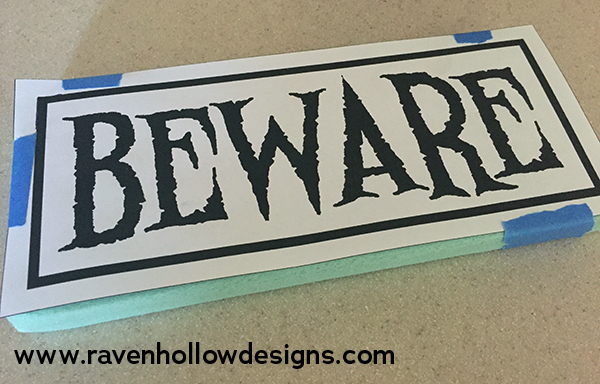
Using a ball point pen, burnishing tool or pencil, trace around the letters and the border, using enough pressure to slightly dent the foam beneath. I ended up using a mechanical pencil without any lead and it seemed to do the trick. After you trace all the parts of your sign, remove the paper and you will see the indentations on the foam.

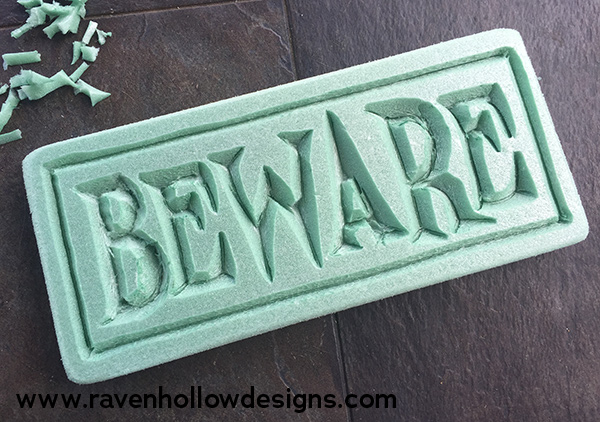
You are now ready to carve the foam. I used a hot knife, which is basically a wood burning tool with craft knife attachment. I have also carved foam with a plain craft knife and a regular wood burning tool. The thing to remember with heated tools is that the foam melts quickly, so keep the tool moving and be careful with how deep you carve. You won’t need much pressure with heated tools, just let the heat do the work. Practice on some scraps before tackling your sign.

To create a beveled look to the lettering and border, I held the knife at an angle while cutting. Be careful not to cut or melt away the inside shapes of the letters (such as in the B, R and A in my sign). Since my sign was meant to look hand carved and aged, I wasn’t worried about perfection. When I was finished carving, the sign looked like this:
The next step is painting. First, coat the whole sign with white primer. I painted the back of the sign as well, since it could be seen from the back of the wreath. After the primer is dry, use a small brush to fill in the carved parts with black paint. Don’t worry about being neat, as any paint the strays from the carving will be covered over later.
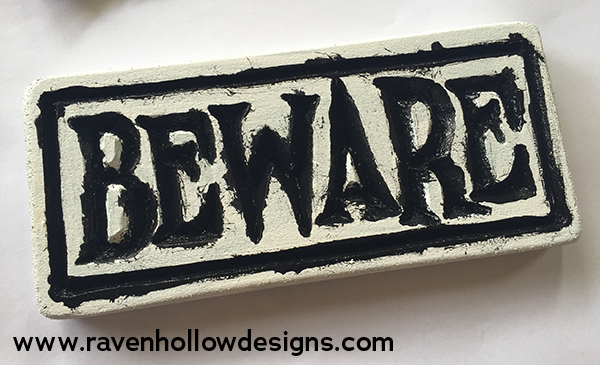
Next, I used a slightly damp sea sponge and dabbed gray paint across the flat parts of the sign (the foam that wasn’t carved with the lettering and border. I played around with the paint to get some texture to it. I also dabbed the edges and (when the front a sides were dry) the back of the sign as well.
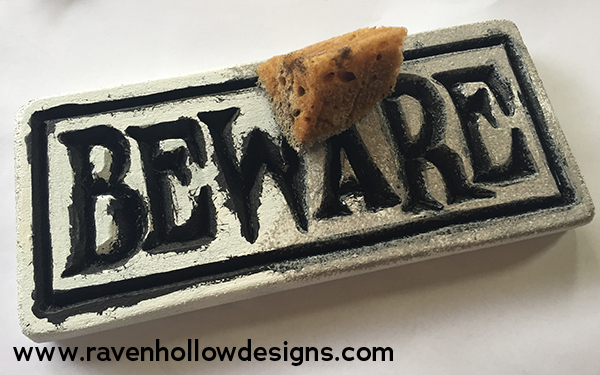
If you get any gray paint in the black carved parts, you can touch them up later with a small brush and more black paint. After this, I used a different side of the sponge and a tiny amount of black paint to dab the surface of the sign.
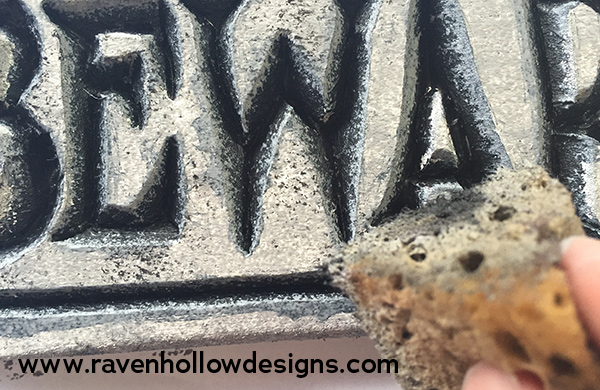
Finally, I did this again with a tiny amount of white paint for highlights.
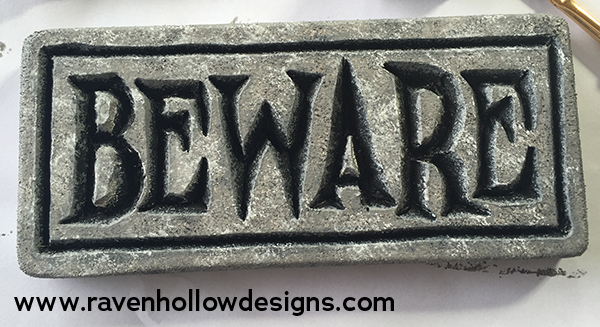
The last step was to seal the sign with clear polyurethane (since the wreath is going to be hung outside on the front door). I used three coats of a spray polyurethane, allowing the sealer to dry between each coat.
I have used the technique (and variations thereof) to create tombstones, signs and pillars as Halloween decorations. You can see many of my projects in my Halloween Home Tour post. Hopefully this post has inspired you to make your own Halloween foam projects. Let me know what you come up with!
